All bosses

The Venomous Abyss

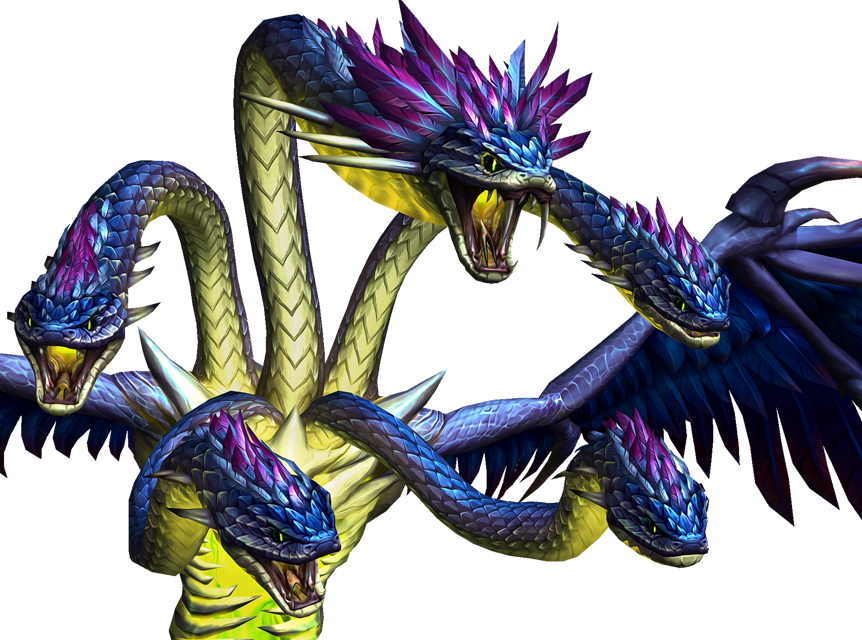
Ula'tek

In game: /journal

Phase 1

Phase 2

Intermission

Phase 3

No abilities for this difficulty.

Ula'tek

FIGHT OVERVIEW

OVERVIEW

Three phase encounter with a brief intermission.

Prepare two groups. You'll have to split to different sides in phase 2.

Ula'tek's eggs are a core mechanic. Eggs hatch into good adds or bad adds. Bad adds happen when eggs are hit by venom mechanics, or hatch naturally after not being killed. Good adds happen when eggs are smashed and broken early.

Pick up eggs to keep them safe from venom mechanics, such as Caustic Waves.

Tanks should stay in melee range of Ula'tek and her Tail otherwise the raid takes damage.

Soak the smashes from the Tail.

Take advantage of the damage amp and attack Ula'tek's Heart during Rage of the Shackled.

In the phase 2, destroy the Warden, then destroy the eggs on the ledges.

During phase 3, help soak three debuffs by loosely assigning players to three groups: melee, ranged, and healers.

FIGHT CHANGES

The fight is not much different on Heroic.

Egg adds gain a few small new abilities.

Breaking Grasping Fangs in phase 2 applies a raid-wide DoT instead of just to the tethered player.

Phase 1

Stage One: Fury of the Serpent Mother

Ahead of time, prepare two groups.

The encounter has a two-part soak, and the raid will split into two and cross to different sides in phase 2.

The same two groups can be used for both mechanics.

Phase 2

Stage Two: Children of the Doomscale

Ula'tek dives away and players should go with their groups to opposite sides of the room.

Travel across the Venom and climb the stairs. The next part of the encounter takes place on these ledges.

Intermission

Intermission: The Shattering

Phase 3

Stage Three: Ula'tek's Ascension

Phase 3 has mechanics from phase 1 as well as a new one: Serpent's Bite.

It's a new soak mechanic and requires three different soak groups.

Plan the groups ahead of time: melee, ranged, and healers.

Pick an ability to see its details.

Malignant Shell

Eggs

Eggs appear throughout the fight. Players can pick them up by walking over them. Eggs hatch into two types:

1. Blightscale Viper, which is dangerous and fully grown. Hatches when an egg's cast finishes or is hit by a venom mechanic.

2. Blightscale Rawling, which is weak and hatches early. Damage the eggs and kill them or smash them with Ula'tek's Tail smash mechanic.

Always avoid hatching vipers. They deal a lot of damage and will probably wipe the raid. Pick up the eggs and keep them safe from any venom. Kill adds when they appear.

Both add types gain abilities on heroic.

Rawlings apply a stacking DoT to their target, and vipers create ground AoE, shield themselves, and deal raid-wide damage.

Everyone

Pick up eggs and keep them safe from Venom

What to do

Keep eggs safe

Caustic Waves

Waves

Ula'tek lifts a wing and sweeps waves of venom across the platform.

Waves also come from the Tail on the side.

Dodge the waves. Protect the eggs!

Everyone

Dodge waves and protect the eggs

What to do

Dodge waves

Call of the Serpent

Eggs

More eggs! Don't let them fall on you; they deal damage when they land.

Everyone

Dodge falling eggs and pick them up

What to do

Pick up new eggs

Mephitic Thrash

Tail AOE

Massive AoE circle around the Tail. Get out.

The tank must quickly run out and back in. Make sure no eggs are left behind.

All players take raid-wide damage and receive a DoT.

Everyone

Move out of the AoE and make sure eggs aren't hit.

What to do

Move out

Spectral Coils

Tail soak

Two soak circles are marked next to the Tail. One group should soak each.

The Tail smashes the soaks one after another, dealing damage to all players.

Everyone

Soak the Tail smash.

What to do

Soak

Rage of the Shackled

Damage amp

Ula'tek's Heart becomes attackable for a short time and takes 100% increased damage.

Rocks fall and must be dodged. Ula'tek pulses raid-wide damage.

Everyone

Dodge while hitting the Heart.

What to do

Hit the Heart

Rattler Slam

Tail

Ula'tek's Tail sometimes acts as a second "boss" throughout the encounter.

One tank needs to remain in melee range of it, otherwise the Tail deals massive raid-wide damage.

The Tail and Ula'tek share health.

Everyone

Tank needs to stay in range of the Tail.

What to do

Tank stay in range

Mother's Wrath

Tankbuster

Tankbuster on Ula'tek's current target. Several quick hits of Nature damage, followed by a knockback, slow, and DoT.

The slow can be removed with typical slow removal tools.

What to do

Use defensives

Necrotic Vapors

Rot damage

Raid-wide rot damage all fight.

What to do

Heal Through

Unchecked Rage

Positioning

Ula'tek deals raid-wide damage if no one is in melee range.

What to do

Tank stay in range

Malice

Interrupt

Each side will fight a Doomscale Warden.

While alive, the Warden protects all eggs on the ledges. Eggs cannot be picked up.

Always interrupt the Warden's malice cast.

Everyone

Interrupt the Warden

What to do

Interrupt

Grasping Fangs

Tether DOT

Several players are tethered. Breaking the tether applies a DoT to the player.

On Heroic, breaking the tether applies a massive raid-wide DoT to both sides of the raid.

Try not to snap more than two at a time, and absolutely don't snap them all at once.

Everyone

Break tether

What to do

Break tethers slowly

Virulent Spit

Swirlies

Swirlies to dodge. They deal massive damage.

Everyone

Dodge the swirlies

What to do

Dodge

Doomscale Cauldron

Eggs

The cauldron boils any eggs inside, hatching weakened adds.

Once you kill the Warden, eggs can be picked up. Pick them up and run to the cauldron to throw them in.

One massive Doomscale egg will also need to be picked up.

Once picked up, a timer starts that will hatch all eggs.

Make sure all eggs go into the cauldron quickly. After the adds spawn, you can travel back to the main Ula'tek platform.

Everyone

Pick up all eggs and put them into the cauldron

What to do

Put eggs into the Cauldron

Desperate Trash

Frontal

Weakened Doomscale adds also cast a frontal cone toward the tank.

Make sure not to hit allies while everyone crosses back to the main platform.

Everyone

Watch out for the frontal.

What to do

Dodge

Anguished Cry

Interrupt

The massive egg hatches a Weakened Doomscale. Make sure to interrupt its cast.

What to do

Interrupt

Spectral Coils

Tail soak

Several times, Ula'tek's Tail smashes the platform. The Tail appears above where a smash will happen.

Players should go with their groups once more and soak, and there should be a group at each location for each soak.

Tons of eggs spawn. Make sure to grab them while you run between soaks.

These smashes will break the platform apart, starting phase 3.

Everyone

Soak a smash, then run to another one quickly.

What to do

Soak smashes

Circling Prey

Destroys platform

Ula'tek destroys the platform in front of her, killing anyone still on it.

Make sure to move to the next platform before this happens.

Everyone

Move to a new platform

What to do

Change platforms

Blightscale Clutch

Adds

Periodically, attackable eggs spawn that need to be killed to prevent them from hatching.

Everyone

Swap to eggs and kill them quickly

What to do

Kill eggs

Acidic Explosion

Focus adds

Some eggs fall directly into the venom, hatching immediately into Shriekers.

This add applies a massive raid-wide DoT. Kill it before it casts another DoT debuff.

Everyone

Swap to Shriekers and kill them quickly

What to do

Kill Shriekers

Serpent's Bite

Soak

A melee, ranged, and healer are bitten, debuffing and marking them with a circle.

This venom debuff stuns and kills them.

Nullify the venom debuff by soaking inside the circles. ALL players need to be soaking.

Use your assigned groups, which probably will be melee, ranged, and healers.

Everyone

Soak the bitten players so they don't die.

What to do

Help soak

Volatile Purge

Spread

After soaking bites, all players are marked with a circle that deals damage.

Spread out to avoid hitting players.

Everyone

Spread quickly

What to do

Spread

Vicious Echoes

Interrupt

Shriekers attempt to cast Vicious Echoes, which stuns the raid and deals massive damage.

Always interrupt this cast or you will wipe.

What to do

Interrupt